Every chocolate chip cookie recipe uses baking soda. Almost none of them explain why. That one teaspoon does more than any other ingredient in the bowl — it controls how flat your cookies spread, how dark they brown, and whether the edges go crispy while the center stays chewy. Get it right and the batch is perfect. Use baking powder instead, skip the soda, or measure carelessly, and something always feels off.
This recipe is classic in every way that matters: real butter, both sugars, one egg plus the technique notes that actually change the result. But it is built around understanding what baking soda does at every stage, so you can make confident adjustments instead of following a formula blindly.
Table content
- 1 The Recipe
- 2 Classic Chocolate Chip Cookies
- 3 Why This Recipe Uses Baking Soda, Not Baking Powder
- 4 The Maillard Reaction: Why Baking Soda Turns Cookies Golden Brown
- 5 What Each Ingredient Actually Does
- 6 The Chill Decision: Why Cold Dough Bakes Better
- 7 Common Problems and How to Fix Them
- 8 Texture Variations
- 9 Storage and Freezing
- 10 Can I Substitute Baking Powder for Baking Soda in Cookies?
- 11 What Happens If I Use Too Much Baking Soda?
- 12 More Recipes From the Baking Cluster
The Recipe
Yield: 24 cookies | Prep: 15 minutes | Optional chill: 30 minutes | Bake: 10–11 minutes | Total: about 1 hour (25 minutes without chill)
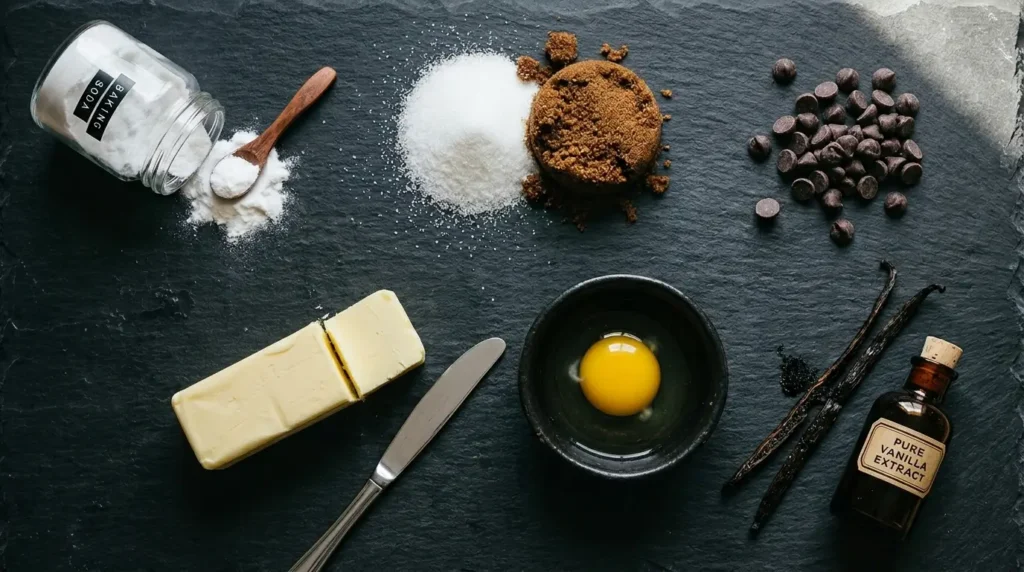
Ingredients
| Ingredient | US | Metric |
|---|---|---|
| All-purpose flour | 2¼ cups | 280 g |
| Baking soda | 1 teaspoon | 5 g |
| Fine sea salt | 1 teaspoon | 5 g |
| Unsalted butter, room temperature | 1 cup (2 sticks) | 226 g |
| Granulated white sugar | ¾ cup | 150 g |
| Light brown sugar, packed | ¾ cup | 165 g |
| Large eggs, room temperature | 2 | 2 |
| Pure vanilla extract | 2 teaspoons | 10 ml |
| Semi-sweet chocolate chips | 2 cups | 340 g |
Instructions

- Set up your oven. Position a rack in the center. Preheat to 375°F (190°C). Line two rimmed baking sheets with parchment paper.
- Mix the dry ingredients. Whisk flour, baking soda, and salt in a medium bowl until evenly distributed. Set aside. Uniform distribution of baking soda matters — pockets of it in the dough cause uneven browning and bitter spots.
- Cream butter and sugars. In a large bowl, beat the room-temperature butter with both sugars on medium speed for 3 to 4 minutes until the mixture is pale, fluffy, and noticeably increased in volume. By hand with a wooden spoon, this takes 5 full minutes of vigorous stirring. Do not shortcut this step — the air you incorporate here affects how the cookies spread.
- Add eggs and vanilla. Beat in the eggs one at a time, making sure each is fully incorporated before adding the next. Add the vanilla and mix briefly. The mixture should look smooth and slightly glossy.
- Combine wet and dry. Add the flour mixture in two additions, folding or mixing on low speed just until no streaks of flour remain. Stop the moment it comes together. Overmixing develops gluten and produces tough, dense cookies.
- Fold in the chocolate chips. Stir by hand with a spatula or wooden spoon.
- Chill the dough (recommended). Cover the bowl and refrigerate for at least 30 minutes, or up to 72 hours. See the section below on why chilling changes the result. If you’re skipping the chill, proceed directly to step 8.
- Portion the dough. Use a 2-tablespoon cookie scoop or two spoons to portion balls of about 35 g each onto the prepared sheets, spacing them at least 2 inches apart. They will spread.
- Bake. 10 to 11 minutes, until the edges are set and golden but the centers still look slightly underdone and glossy. This is intentional — the residual heat of the pan finishes the center after the oven door opens.
- Cool on the pan. Leave the cookies on the baking sheet for 5 minutes before transferring to a wire rack. This resting period is where the structure sets. Moving them too early causes them to fall apart; moving them too late causes them to overbake on the hot pan.
Nutrition per cookie (approximate): 195 kcal · Fat 10 g · Saturated fat 6 g · Carbohydrate 27 g · Sugar 18 g · Protein 2 g · Sodium 130 mg
PrintClassic Chocolate Chip Cookies

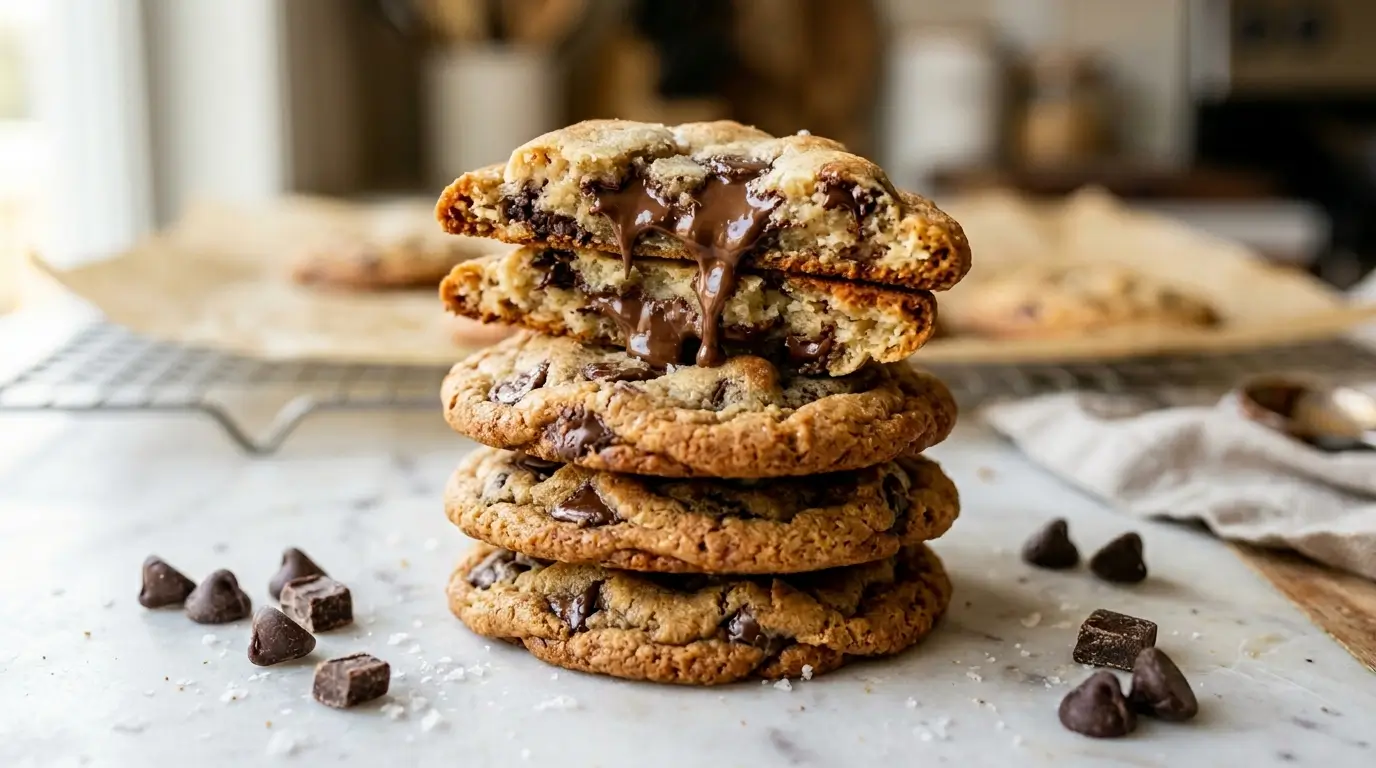
Crispy at the edges, chewy in the center, and deeply golden — this classic chocolate chip cookie recipe is built around understanding what baking soda actually does in the dough. One level teaspoon controls spread, browning, and flavor. Get it right and every batch comes out perfect.
- Prep Time: 15 minutes
- Cook Time: 11 minutes
- Total Time: 26 minutes
- Yield: 24 cookies 1x
- Category: Cookies
- Method: Baking
- Cuisine: American
- Diet: Vegetarian
Ingredients
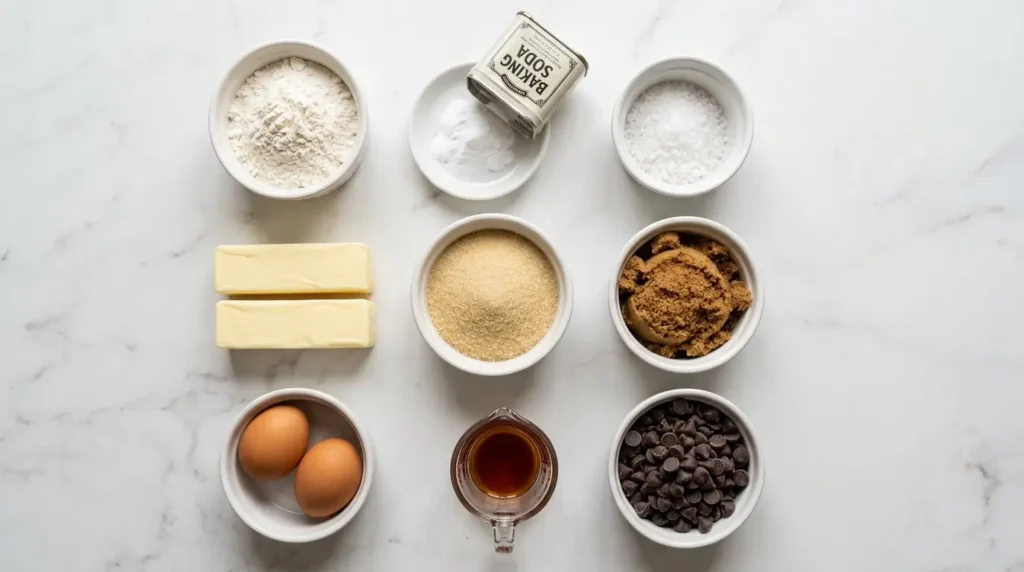
- 2¼ cups (280 g) all-purpose flour
- 1 teaspoon (5 g) baking soda
- 1 teaspoon (5 g) fine sea salt
- 1 cup (226 g) unsalted butter, room temperature
- ¾ cup (150 g) granulated white sugar
- ¾ cup (165 g) packed light brown sugar
- 2 large eggs, room temperature
- 2 teaspoons (10 ml) pure vanilla extract
- 2 cups (340 g) semi-sweet chocolate chips
Instructions
- Position a rack in the center of the oven. Preheat to 375°F (190°C). Line two rimmed baking sheets with parchment paper.
- Whisk flour, baking soda, and salt in a medium bowl until evenly combined. Set aside. Uniform distribution of baking soda matters — pockets of it cause uneven browning and bitter spots.
- Beat room-temperature butter with both sugars on medium speed for 3–4 minutes until pale, fluffy, and increased in volume. By hand with a wooden spoon this takes 5 full minutes. Do not shortcut — the air you incorporate here affects how the cookies spread.
- Add eggs one at a time, beating well after each. Add vanilla and mix briefly until smooth and slightly glossy.
- Add the flour mixture in two additions, mixing on low just until no streaks of flour remain. Stop the moment it comes together. Overmixing develops gluten and produces tough, dense cookies.
- Fold in the chocolate chips by hand with a spatula.
- Cover and refrigerate for at least 30 minutes and up to 72 hours. Optional but strongly recommended — chilling gives thicker cookies and deeper, more caramel-forward flavor.
- Scoop dough into balls of about 35 g each, spacing 2 inches apart on prepared sheets. Bake 10–11 minutes until edges are golden and set but centers still look slightly underdone. That’s intentional — residual pan heat finishes the center after the oven.
- Leave cookies on the baking sheet for 5 minutes before transferring to a wire rack. They firm up as they cool. Moving them too early causes them to fall apart; too late and they overbake on the hot pan.
Notes
Chill time (not counted in total time above): 30 minutes minimum, overnight preferred, up to 72 hours for maximum flavor.
Weigh the flour. 280 g is more reliable than measuring by cup — scooping packs more flour than intended and makes cookies cakey and dry.
Flat cookies? Your butter was likely too warm or partially melted. Chill the portioned dough balls for 15 minutes before baking to fix this mid-session.
Brown butter variation: Melt butter until golden and nutty (5–7 minutes over medium heat), cool to room temperature, then proceed with creaming. Adds significant toffee depth.
Freeze the dough: Freeze portioned balls flat until solid, then transfer to a bag. Keeps 3 months. Bake from frozen at the same temperature, adding 2–3 minutes.
Nutrition
- Serving Size: 1 cookie (35 g)
- Calories: 195
- Sugar: 18
- Sodium: 130
- Fat: 10
- Saturated Fat: 6
- Unsaturated Fat: 4
- Trans Fat: 0
- Carbohydrates: 27
- Fiber: 1
- Protein: 2
- Cholesterol: 35
Keywords: chocolate chip cookies recipe, cookies with baking soda, classic chocolate chip cookies
Why This Recipe Uses Baking Soda, Not Baking Powder
This is the single most important question in chocolate chip cookie chemistry, and the answer explains a lot about what makes a great cookie.
Baking powder is a blend of baking soda and an acid (usually cream of tartar or sodium aluminum sulfate) in measured proportions. It is designed to be self-contained — add liquid, and it reacts. That predictability is ideal when a recipe needs a controlled, neutral rise, as in a layer cake or light muffin.
Cookies need something different. They already have acidic ingredients in the bowl — brown sugar contains a small amount of acid from the molasses, and butter contributes a faint acidity as well. Baking soda (pure sodium bicarbonate) reacts directly with those acids, releasing carbon dioxide gas that helps the dough lift. But the more important effect is chemical: baking soda raises the pH of the dough, making it more alkaline. That alkalinity is what supercharges the Maillard reaction.
If you want the full breakdown of how baking soda and baking powder differ structurally and chemically, see our complete comparison guide.
The Maillard Reaction: Why Baking Soda Turns Cookies Golden Brown
The Maillard reaction is the process responsible for browning in cooked food — it is what makes bread crust, seared steak, and roasted coffee smell the way they do. It requires heat and a reaction between amino acids and reducing sugars. Critically, it accelerates under alkaline conditions.
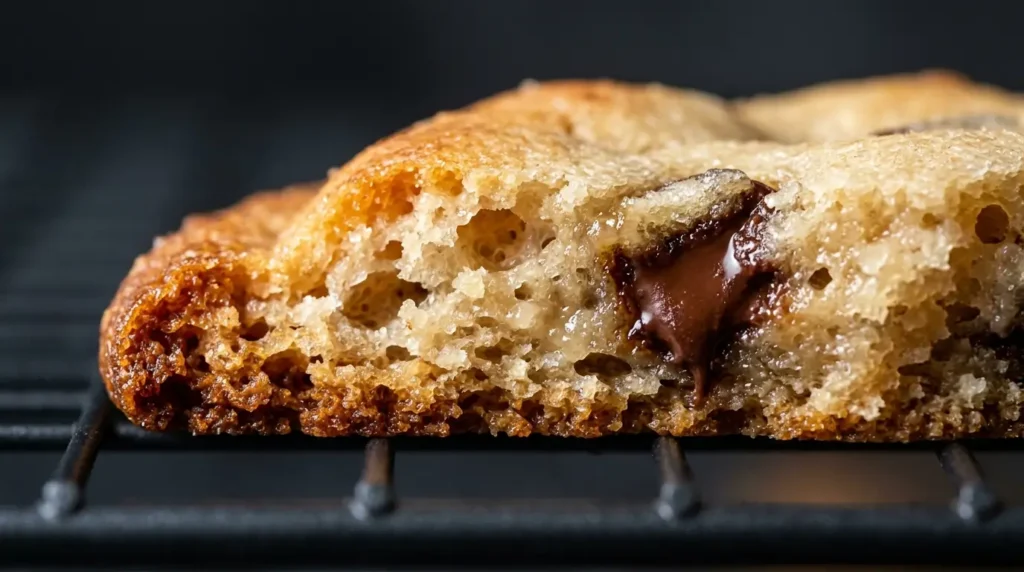
By raising the pH of the dough, baking soda effectively lowers the temperature at which browning occurs. Cookies baked without baking soda come out pale and slightly underdeveloped in flavor even when fully cooked through. Cookies with the right amount of baking soda brown faster, develop deeper flavor compounds, and achieve that characteristic toffee note at the edges — while the interior, protected from direct oven heat, stays soft and slightly molten.
This is also why the baking soda measurement matters so much. Too little and the cookies come out pale, flat, and bland. Too much and the reaction overshoots: cookies spread excessively, develop a soapy or metallic aftertaste (residual sodium bicarbonate that never reacted), and can take on an oddly dark color without the flavor complexity to match it.
One level teaspoon measured correctly is the sweet spot for this recipe. For how to check whether your baking soda is still active, see our guide on what baking soda is and how it works.
What Each Ingredient Actually Does
Butter (1 cup)
Butter provides fat, moisture, and flavor. Room temperature butter is soft enough to trap air during creaming; cold butter cannot trap air and produces a denser, thicker cookie; melted butter produces chewier, slightly denser cookies with more spread because it skips the air-trapping step entirely. For this recipe, room temperature — meaning the butter holds a finger-dent but is not greasy — is the target.
Two Sugars
Both granulated white sugar and light brown sugar are in this recipe for distinct reasons. White sugar promotes spread and crispiness; it melts quickly in the oven and creates caramelization at the edges. Brown sugar absorbs moisture from the air and keeps the center chewy days after baking; it also contributes the molasses flavor that most people associate with a “classic” chocolate chip cookie. The 1:1 ratio here is balanced. If you prefer crispier cookies, increase white sugar slightly. If you prefer softer and chewier, tip the balance toward brown.
Two Eggs
Both eggs contribute structure and moisture. The white adds protein that helps the cookie set; the yolk adds fat and richness that keeps it soft. Some recipes use one whole egg plus one extra yolk to maximize richness — this works well and produces a noticeably more tender crumb. Both eggs at room temperature incorporate more smoothly and emulsify better with the butter.
Vanilla Extract (2 teaspoons)
Two teaspoons is more than many recipes call for. In a cookie this buttery and sugary, vanilla at lower amounts disappears entirely. Two teaspoons adds a background warmth that elevates the chocolate without competing with it. Use pure extract, not imitation — the flavor compounds are genuinely different and the difference is noticeable in a recipe this simple.
Semi-Sweet Chocolate Chips (2 cups)
Semi-sweet at 60–62% cacao is the classic choice because it balances sweetness against bitterness. You can substitute bittersweet chips (63–70% cacao) for a more intense chocolate flavor with less sweetness, or use roughly chopped chocolate bars — uneven pieces create puddles of melted chocolate in the finished cookie that many bakers prefer to uniform chips.
The Chill Decision: Why Cold Dough Bakes Better
Chilling cookie dough is the step most people skip and most experienced bakers never skip. Here is what it actually changes.
When dough rests in the refrigerator, several things happen simultaneously: the butter solidifies, which slows spread in the oven and helps the cookie stay thicker; the flour fully hydrates, which improves texture; and the sugars begin to break down slightly through enzymatic activity, concentrating their flavor. A 30-minute chill produces a noticeably better cookie than unbaked dough. A 24-hour chill produces a visibly better cookie. At 48 to 72 hours, the flavor becomes noticeably more complex — browner, more caramel-forward, more nuanced.
If you are making cookies for the same day and cannot spare the time, the recipe still works. But if you plan ahead, chilling the dough overnight is the highest-return no-extra-effort upgrade available.
Common Problems and How to Fix Them
Flat, greasy cookies. The most common cause is butter that was too warm or partially melted before creaming. Butter that is too soft cannot trap air. The fix: chill the mixed dough for 30 minutes before baking, and start with butter that has the right consistency — soft but still holding its shape.
Cakey, puffy cookies. Usually caused by too much flour (the most common measuring error when scooping directly from the bag), overmixing the dough after adding the flour, or eggs that were too cold and did not emulsify properly. Weigh your flour if possible — 280 g is more reliable than 2¼ cups measured by the scoop-and-sweep method, which consistently packs more flour than intended.
Cookies that spread into one thin mass. The dough was too warm going into the oven, the baking sheets were hot from a previous batch, or the pan was over-greased. Use room-temperature (not warm) dough, always use fresh parchment on a cooled sheet, and never grease parchment — chocolate chip cookies have enough butter to release without help.
Pale, underflavored cookies. Not enough baking soda (measure carefully and confirm it is still active), oven temperature too low (check with an oven thermometer — most home ovens run 25°F off), or the cookies were underbaked. Golden edges are non-negotiable for flavor development.
Soapy or metallic aftertaste. Too much baking soda, or old baking soda that has partially converted and will not react fully. Measure exactly one level teaspoon and make sure your baking soda passes the fizz test described in our baking soda guide.
Texture Variations
Extra chewy: Replace one whole egg with two egg yolks. Use all brown sugar (300 g). Slightly underbake by 1 minute. Pull when the center looks just barely set.
Extra crispy: Use all white sugar (300 g). Bake at 350°F (175°C) for 13 to 14 minutes instead, giving more time for spread and moisture evaporation. Let cool completely on the pan.
Brown butter version: Melt the butter in a saucepan over medium heat, stirring frequently, until the milk solids turn golden and it smells nutty, about 5 to 7 minutes. Pour into a bowl, let cool to room temperature (about 30 minutes), then proceed with creaming. The depth of flavor this adds is significant. The cookies will be slightly flatter than the standard version because brown butter has slightly less water content than raw butter.
Storage and Freezing
Baked cookies keep in an airtight container at room temperature for 4 to 5 days. A slice of bread in the container helps maintain moisture; the bread stales first.
Unbaked dough balls freeze extremely well. Portion the dough, freeze flat on a baking sheet until solid (about 2 hours), then transfer to a zip-lock bag. Bake straight from frozen at the same temperature, adding 2 to 3 minutes to the bake time. Frozen dough keeps for up to 3 months.
Can I Substitute Baking Powder for Baking Soda in Cookies?
You can, but the result will be noticeably different. Baking powder does not raise the pH the way baking soda does, so the Maillard reaction is slower — cookies come out paler and less flavorful. You would need approximately three times as much baking powder to achieve the same leavening lift (about 1 tablespoon for this recipe), but even then, the browning and flavor will not match. This is one recipe where baking powder is a poor substitute. Full substitution guidance is in our baking soda substitute article.
What Happens If I Use Too Much Baking Soda?
Excess baking soda that never reacts — because there is not enough acid in the dough to neutralize it — leaves a soapy, bitter, or metallic aftertaste. More than about 1¼ teaspoons in this recipe will start to produce that result. The cookies will also often spread more than intended and brown too quickly on the outside while the interior remains underdone. Stick to the measured amount.
More Recipes From the Baking Cluster
The Maillard reaction and baking soda’s role in it comes up in nearly every baked good. If this article gave you useful context, these recipes apply the same principles to different formats:
- Classic Irish Soda Bread Recipe — baking soda as the sole leavener, with buttermilk providing all the acid
- Homemade Banana Bread With Baking Soda — overripe bananas supply the acid; baking soda does double duty for lift and browning
- Classic Buttermilk Biscuits — baking soda plus buttermilk, layered technique, fast bake at high heat
For every recipe in this cluster and how baking soda behaves across different applications, start at the baking recipe hub.